
How I transformed my bathroom for less than £100
Written by Rebecca Connolly
Although I’m not in my forever home, I still want to update areas of my house, but on a small budget. This blog will explore the creative ways I have updated my bathroom for under £100 and hopefully inspire you to look at ways to improve your home without spending a fortune.
As everyone knows, getting on the housing ladder is extremely hard and only becoming harder. Three years ago now, my fiance and I were delighted to be buying our first home. It was such an achievement and we had both worked really hard to make it happen.
When you are searching for a house (don’t remind me of all those hours on rightmove!) and you find the one, you inevitably have to compromise - in size, location or style. We bought the house knowing we would likely be moving again in a couple of years as it is not our ‘forever home’. You quickly learn what works for you and what doesn’t. We have a list as long as our arms of ‘must haves’ for our next home, one being a driveway - this is non negotiable according to Iain.
However that does not mean we don’t love where we live right now. At the moment there are the two of us and our cat Daisy. This is our place of sanctuary - especially now with the world how it is. We have spent time on our house and done lots of things to improve our home, without spending all of our cash! Today I am sharing the creative ways I updated my tired bathroom - and it cost me less than £100!

The Bathroom
The bathroom was truly in need of a complete overhaul. I hated the beige tiles that were literally everywhere and the plain white suite that had nothing to say. In 2019 we had a leak in our bathroom roof and it actually partially fell down - that is how tired it was!! I'd love to have an entirely new bathroom, however sometimes you have to scale back and think about what small creative things you can do to improve what you already have.

Updating furniture with vinyl
I really love the black accents we are seeing in interiors at the moment and I have lots of black around my home, from my dining table and kitchen tiles to a black and brass floor lamp in my living room. So I wanted to take this colour into my dated bathroom and as it's so striking I knew it would revitalise the space. The very first thing I did was wrap black matt vinyl (B&Q) on the vanity unit. The vinyl comes in a long rolled tube and you simply measure the piece you need, cut it out and then you’ve got the pieces you need. Apply one by one to the piece of furniture, pulling off the backing and pressing down using the vinyl wrapping squeegee tool to get rid of any bubbles. Easy! Having said that, it was particularly tricky around handles and you will more than likely have a few air bubbles, which do not bother me too much as it looks far better than it did before!

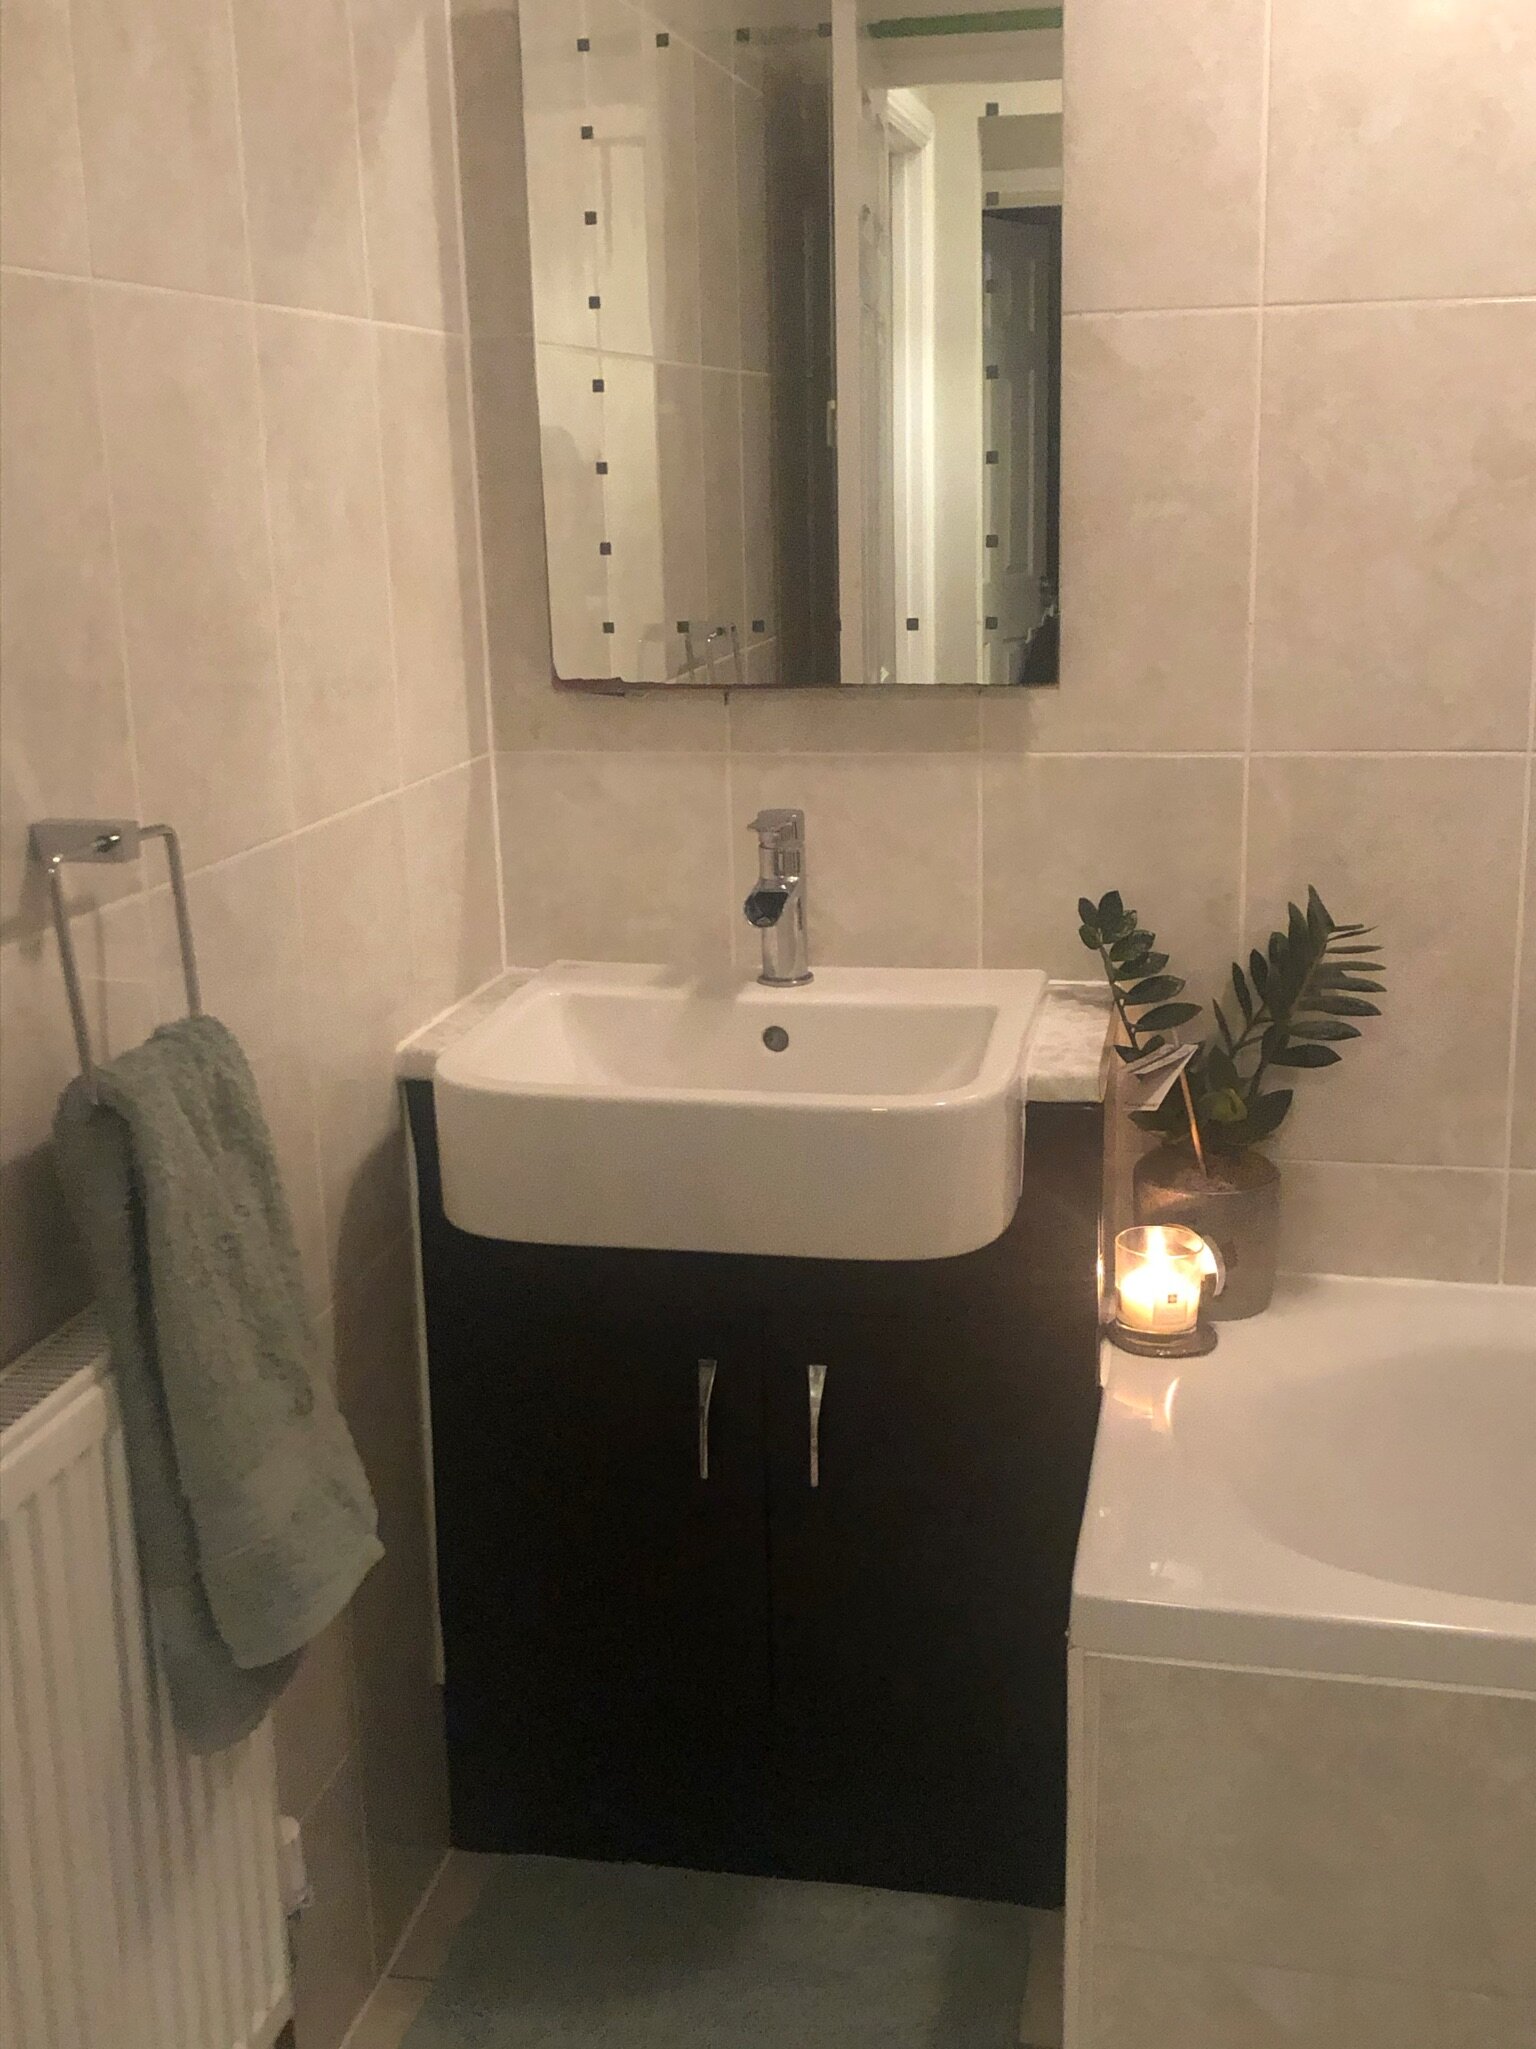

On the top of the vanity unit I used vinyl again but in a warm marble pattern, again from B&Q. This ties in with the wall tiles really well and I was very impressed as this vinyl did not have as many bubbles as the black matt. I applied this around the sink and I actually think it’s hard to tell it’s not real!
Floorpops
Remember me saying there were beige tiles everywhere? Well I was not lying!! I knew the floor was something I needed to change and I needed a quick fix! As I was searching for an inexpensive solution I discovered floorpops! This is a fun name for self adhesive floor tiles from Dunelm.
What can I say about these… they are fantastic!
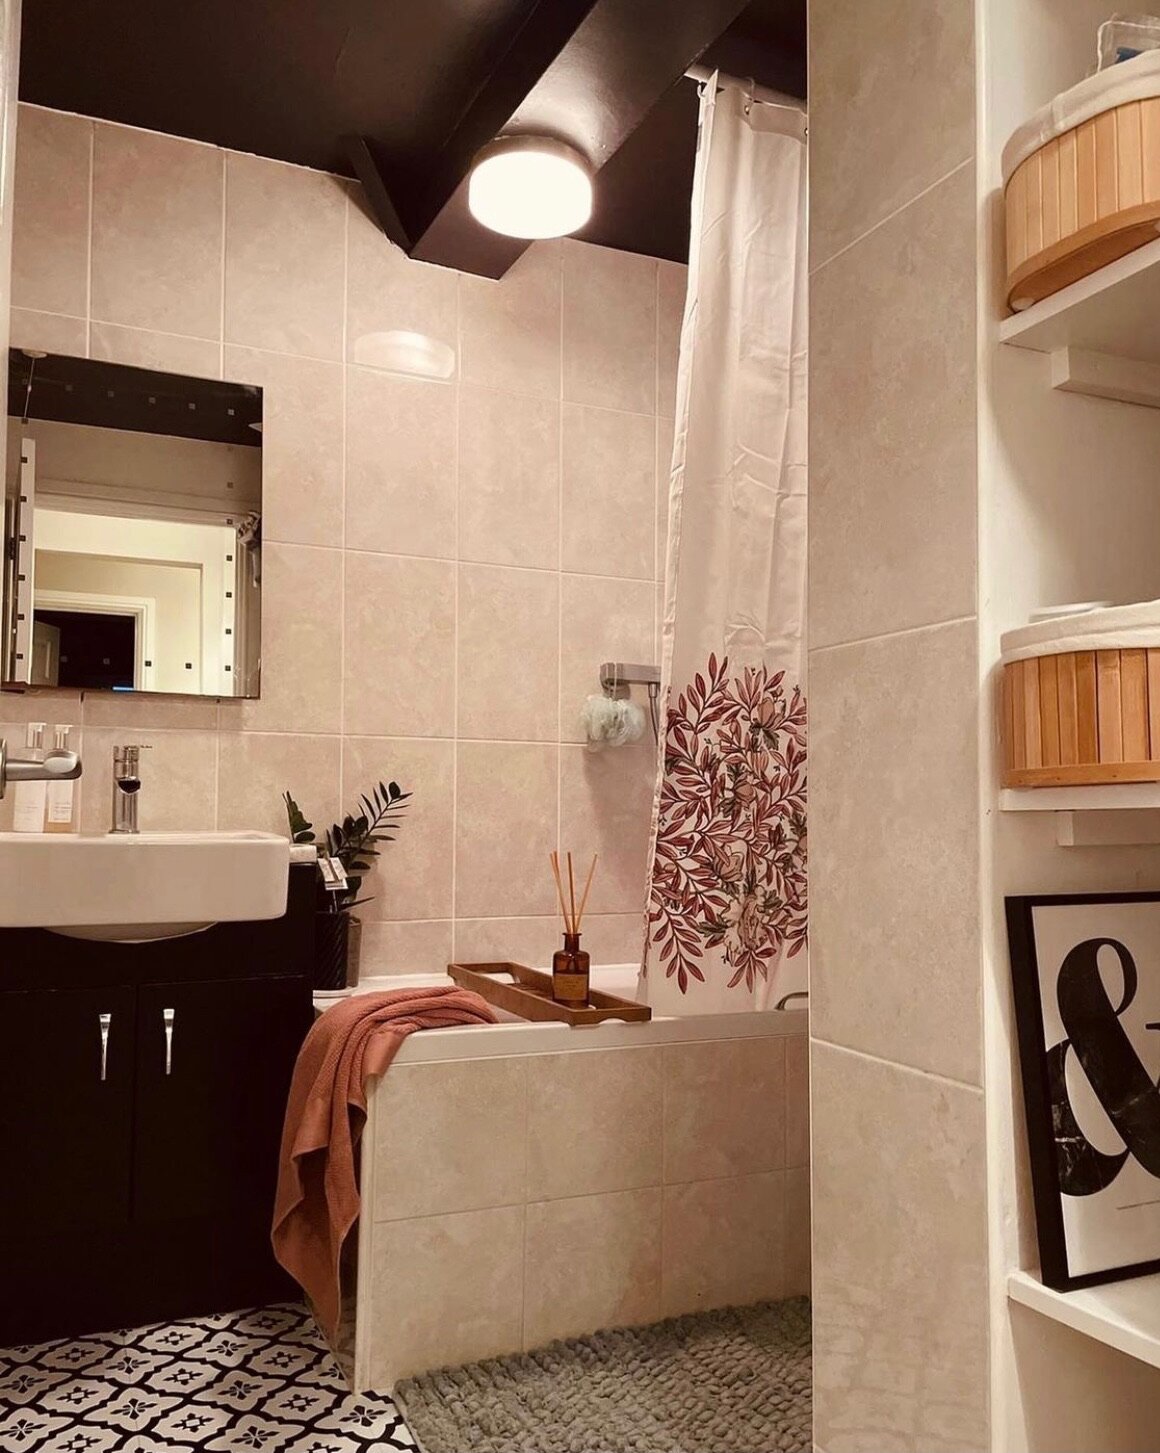
They have made the biggest visual impact to the room. They add pattern and contrast which I think is what was missing from the space. I’ve seen people use these in kitchens, around fireplaces and they really do look great. I went for the white and black comet pattern which is really bold and effective. This reinforces the black in the room and instantly modernises the space. They are very easy to lay, all you have to do is make sure you plan where you want to stick them. There will be some full tiles and some that you have to cut. It is best to keep the cut ones at the edges and out of sight and the full ones where there is a natural walkway. The best thing about these tiles is that there is no mess, no grout, or having to go and buy tools you don’t have. Winner!

Dark ceiling
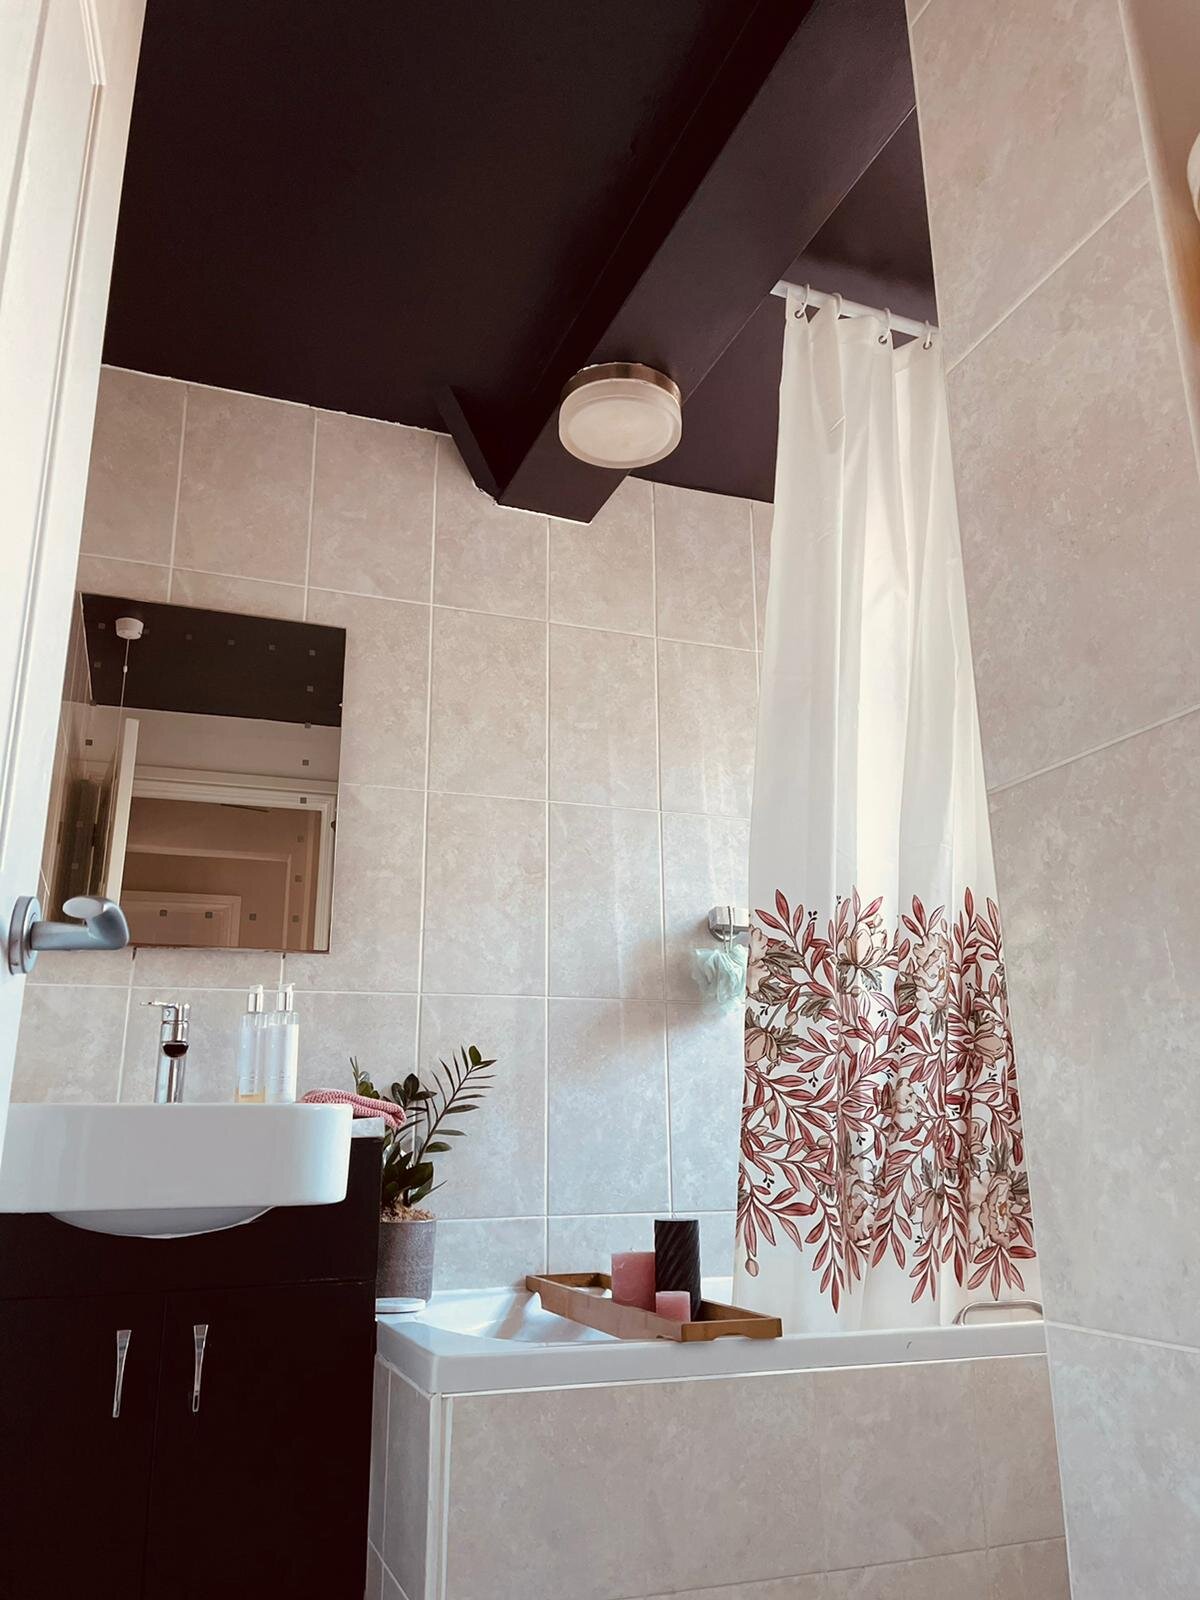
I love a dramatic bathroom with beautiful bold wallpaper and since I have tiles everywhere I had to leave my wallpaper dream behind. The only place I could get my dramatic fix was the ceiling. So I painted it black! This might sound crazy and a step too far but it really works! Bathrooms do not have the same functionality as other rooms of the house so they don’t need to be especially light or feel spacious. As we don’t spend a lot of time in this room you can be bold and experimental and have fun with it!
I painted the ceiling Farrow and Ball Paean Black No.294. This colour is a dark rich black with a red base which means when the light hits it, it has a warmth to it and you can feel that in the room. This paint is more expensive than getting a colour mixed, and subsequently is the most expensive item in my bathroom update, however I feel it was worth it for a colour that is so interesting and complex.

Accessories
I tried to keep the colour palette to three or four colours for the room and I stuck to these with the accessories I selected. The colours were black, stone, pink and green.

I love the simple nature of the shower curtain. It is white all over with a medium sized horizontal stripe of pattern. I think the shower curtain works so well because it is a different type of pattern to the floor. By introducing some floral patterns it softens the overall design and ties into the colour palette perfectly.
The towels I went for are a beautiful waffle fabric from H&M Home in a dusky pink shade which complements the red in the ceiling paint really well. Pink is also a wonderful colour to pair with green and the bath mat and plant all work together to complete the look.


So although these are all relatively simple ideas, they have transformed my bathroom. And they are ideas that you can easily adapt to your own home. I think it is great to try new things and be a bit creative, especially if you're on a tight budget.
If you need some friendly expert help in your home, we have decades of experience in overcoming all sorts of design dilemmas, and can give you the confidence to move forward with changes in your home. Book a free Discovery Call and see how we can help you today.