How to decorate your Christmas tree like a professional
Written by Catherine Seagrave
Should your tree be a traditional collection of family mementos or a stylish statement piece? And does it matter??!
Let’s just get this out the way first - decorating your home for Christmas is hard work!! In my home, it feels like I have to reshuffle the entire house to accommodate the Christmas tree, which brings with it an enormous amount of cleaning and vacuuming, rearranging and hiding of surplus stuff. By the time I get to considering the decorations I am pretty exhausted and reaching for the gin!! But the actual decorating of the tree doesn’t have to be that hard and with some top tips, it can be a fun family tradition.
I often get asked how you can combine the years of family Christmas decorations with the new or latest Christmas style in the shops. Should the tree be a masterpiece of coordinated style or a homage to your child's preschool days? I think that this is such a personal choice and there is really no right or wrong. When it comes down to it, creating a festive centrepiece is not so much about your ornament selection, but more about how you arrange them on the tree. Sometimes even after buying new decorations and putting in lots of effort, the tree still doesn’t quite look how you imagined.

The rules of decorating a tree are really very similar to arranging accessories in your home - you are aiming for balance, depth and groupings that lead your eye around the tree. Whether you have a real or artificial tree, beautiful matching decorations or a mismatched collection of special mementos, here are some insider secrets and tips which can help you get your Christmas tree looking it’s very best.

1. Spend time shaping the tree
If you have opted for an artificial tree, it really is worth taking the time to fluff the branches up. They get flattened and bent when in storage and benefit from some tlc to move every branch into the best position.
I usually go for a real tree and finding the perfect symmetrical one can be a challenge! After looking at far too many at the Christmas tree farm, I generally still have to take my secateurs to it when I get home and give it a bit of a trim. Once in place spend some time turning it to make sure you have the best side on display.
2. Test your lights work before you put them on the tree!
This can definitely save you time and a lot of frustration - there’s nothing worse than artfully arranging the lights only to find they don’t work anymore. As a general rule you’ll need about 100 bulbs for every 2-3ft of tree to really light it up. It’s best to match the wire colour to the tree so that they disappear as much as possible.
Start at the bottom of the tree near the trunk and wind the lights around the tree, concentrating on the centre to give an inner glow. Weave under and over the branches so that the tree is lit from above and below each branch.
Lights come in so many colours, shapes and sizes. Personally I prefer a warm light, rather than a white or blue bulb as I find they give a cold feel to the room. And I do have quite a strong dislike of the rapid flashing light settings, but if you like the disco look - go for it!
3. Add a tree topper
Tree toppers finish a tree but can be tricky to place. I often find that they are too heavy to go at the top of the tree, and either make the branch bend awkwardly or just fall off. A paper star can be a good alternative or attach your favourite bauble as the star of the show.


4. Drape your beads
Next add beads, ribbon or garlands if you have any. You are looking to create soft loops around the tree, draped from branch to branch, giving structure to the decorations. If you are using ribbon, look for the wired kind so that you can bend and twist it into shape
5. Time for the baubles
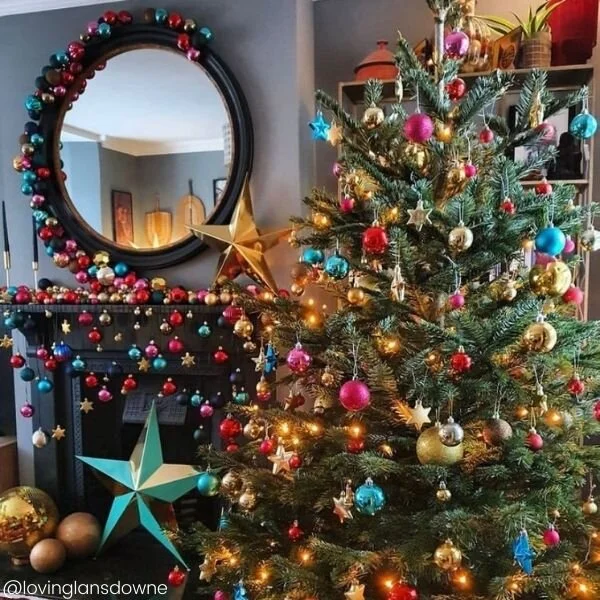
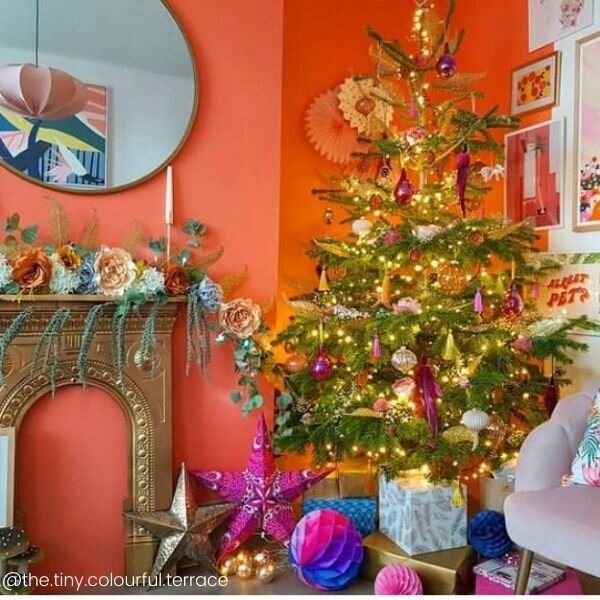
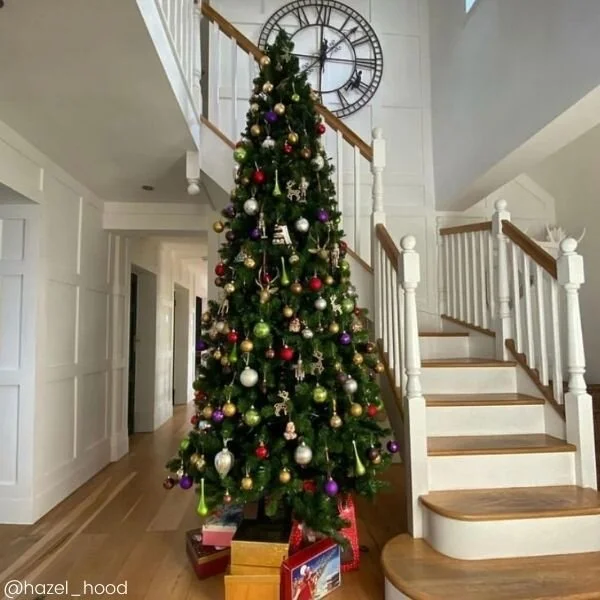
It’s time to start adding the baubles. Begin with your heaviest decorations and place them towards the centre of the tree to support them. You don’t want them to pull the branches down and give the tree a droopy look. Fill the rest of the inner branches with your less expensive baubles, but choose shiny ones that will catch the light and add depth to the tree and extra twinkle. By creating layers, you are adding to the 3 dimensional effect and building the interest.
6. Add your special baubles
Your favourite decorations want to be the stars of the tree, the main feature and take pride of place. Add the larger ones towards the bottom of the tree and the smaller ones towards the top to help with the overall balance. If you are wanting to create a stylish coordinated look, limit it to a maximum of 3 colours and use a mixture of different textures with glittery, shiny and matt decorations. An extra tip is to make sure that the baubles actually hang. You don’t want them to touch the lower branch and be resting on it. If there isn’t enough space for the bauble I shorten the thread or bend or trim the lower branch.

7. Use branches of flowers and berries
A new idea that has gained popularity in the last couple of years is to add extra branches (called picks) to the tree. They can be beautiful flowers, ice crystals or snowy pinecone branches that can be laid on to the Christmas tree. If you have a few bare patches or uneven branches they can be a great way to fill in the gaps.
8. Final finishing layer
Stand back from the tree and squint your eyes. I know it sounds odd, but it really does help you to see the empty spaces better. Fill the gaps with mini baubles, glass icicles or tiny bells on the tips of the branches.
9. Tree skirt
A tree skirt can make your tree look professionally finished. A rattan weave basket is a timeless option, but you could just wrap some fabric or hessian around the base to hide the stand and the light cables.
10. Pile up the presents!!
Definitely the finishing touch and guaranteed to add to the excitement. Arrange the presents around the tree and then sit back and admire - and probably fall asleep!!
I hope these tips and tricks help you achieve a beautiful, balanced Christmas tree - whether you choose a coordinated chic look, or a chaotic family tradition masterpiece - your tree is the sparkling centrepiece of your festive activities.
If you would like any more help or advice, we are always available at The Living House to offer personalised styling tips at surprisingly affordable prices.